TL;DR : Enable free 2FA using an Ubuntu server, Google authenticator and FreeRadius on service supporting radius authentication.
So, I’ve been messing around with this for a while, and I decided I’d create a post showing how to do it.
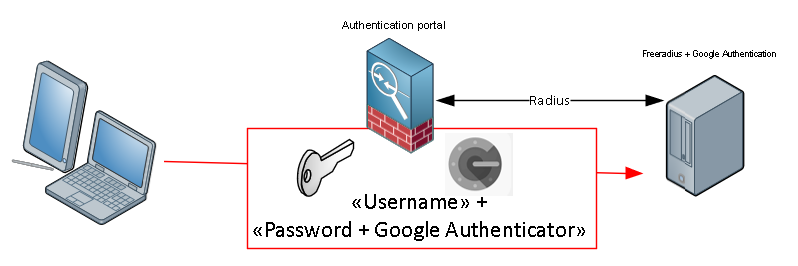
Basicly i have a small Ubuntu Server, with Free radius, and Google authenticator module. Using the users defined on the Ubuntu server as allowed-users.
Step1: Start installing the needed tools on the Ubuntu server running this command
This will install the applications and tools you need. There are different ways of setting up free-radius in terms of the user running the service, but since I hate services running as root I used the freerad user account with lower privlegdes.
Step 2: edit the /etc/freeradius/users file, and add the following:
Step3: edit the /etc/freeradius/sites-enabled/default and remove # before PAM
Step4: edit the file /etc/freeradius/clients.conf. Add these lines to the end. Change the ip-adress allowed andradius secret to whatever you need it to be, I recommend using a password generator…
Then Restart the service: sudo service freeradius restart
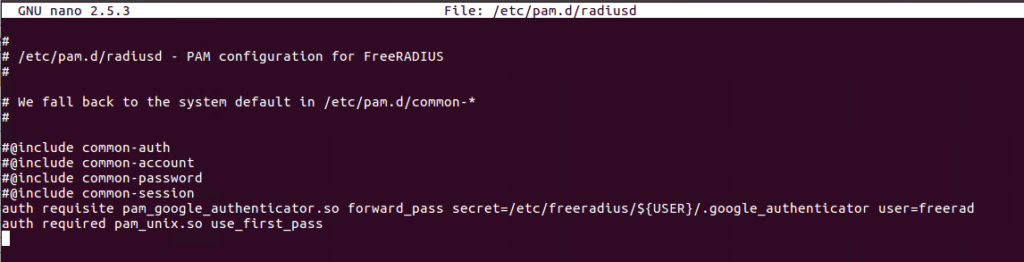
Step 5: Then edit the /etc/pam.d/radiusd file to define the google authenticator:
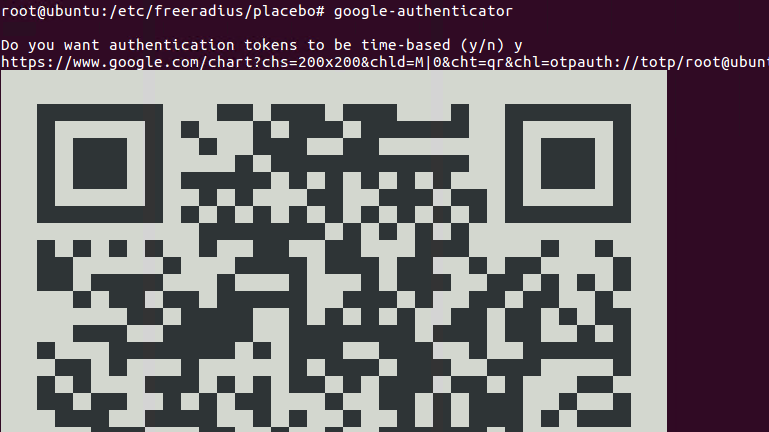
Step 6: For each user you need to create a google authenticator token. running the command google_authenticator as each user will guide you trough the process.
You can scan the QR-code in the google authenticator app, and ofcourse keep the backupcodes of later use (you can access these keys by viewing .google_authenticator file)
A file named .google_authenticator will be created in each users homefolder. We need to move this file in to the freeradius folder under /etc/freeradius/*USERNAME*
Step 6.1: Since we dont use the root user we need to allow the freerad user to access the google authenticator file for the user (the user is named TEST here):
Step 7: Test the setup using radtest:
Yellow is the google authenticator code
If the test is successfull you should see this line:
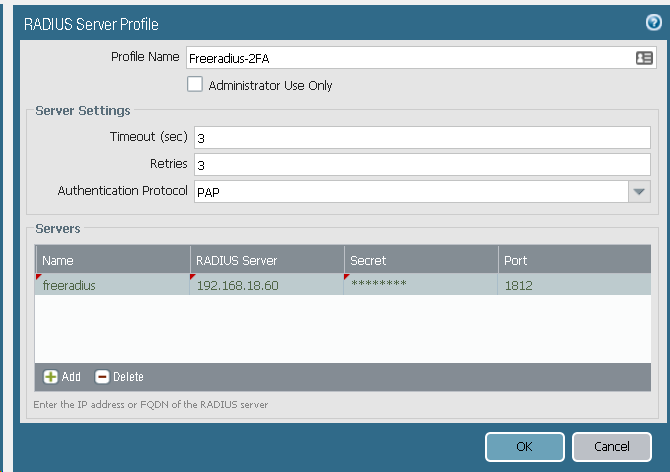
Step 8: Configure the Palo Alto firewall to use the radius server with 2FA for Global Protect VPN:
Go to Device, then Server Profiles, and select Radius. Create new radius profile:
To test the settings, commit and from CLI to the firewall type:
Ofcourse you need to change the profilename and username to what it needs to be. At the passwordprompt type YourPassword+GoogleAuthenticatorCode Result should look something like this.
For more troubleshooting if this does not work.
tail -f /var/log/auth.log
or
tail -f /var/log/freeradius/freeradius.log
Troubleshooting from cli (yes, i use Tmux.)
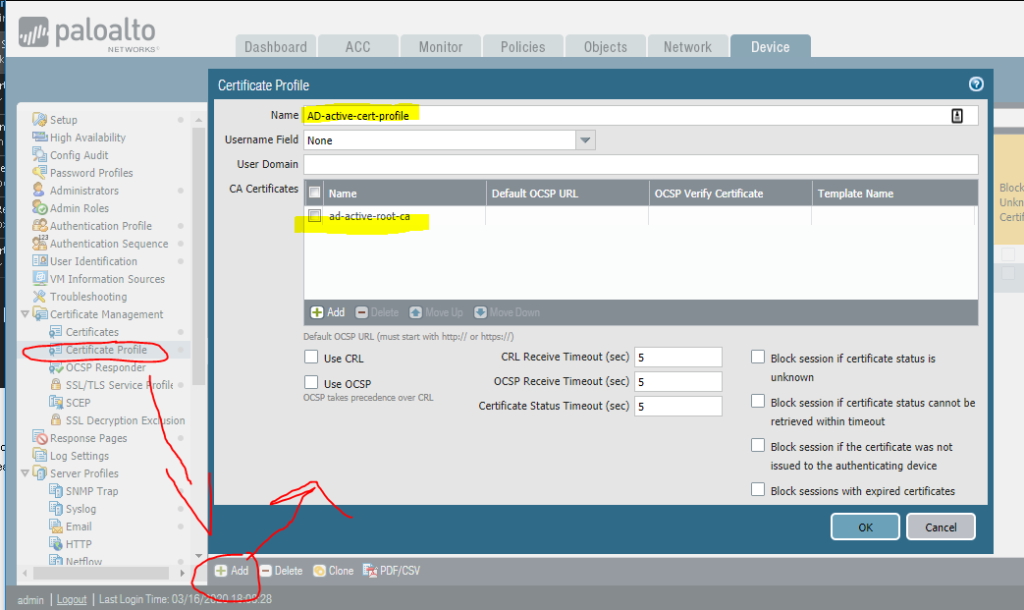
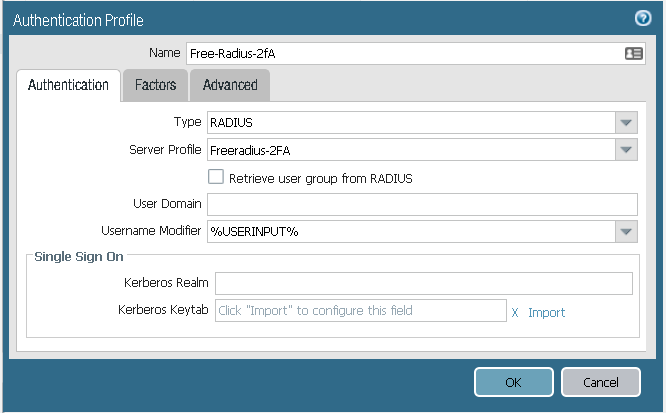
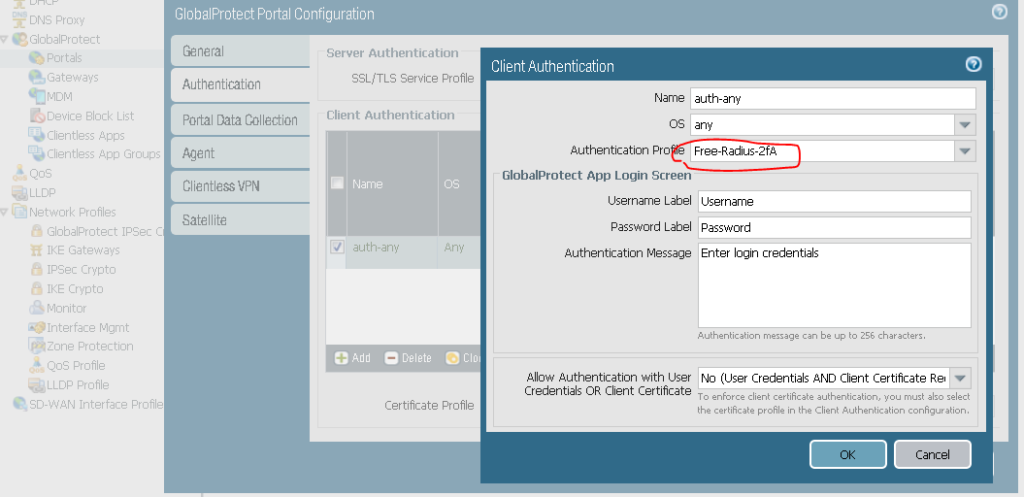
Step 9: Go to authentication profile, and add a new
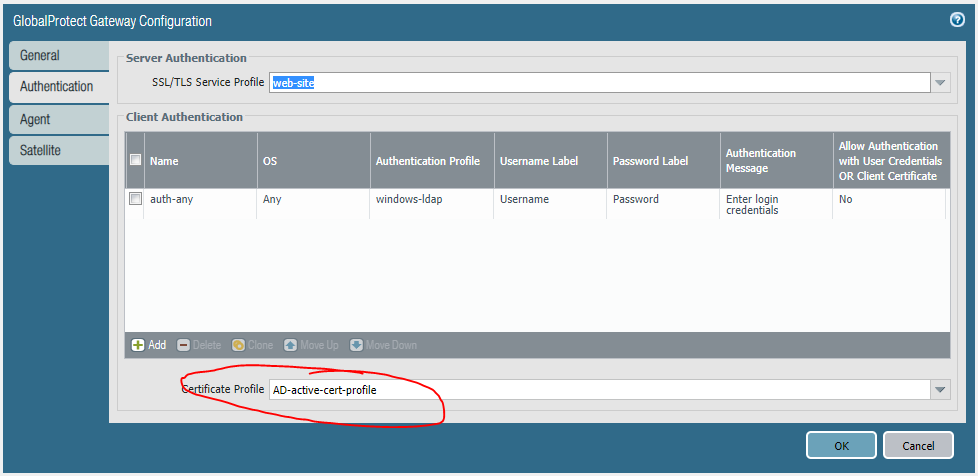
Add this profile to the portal config:
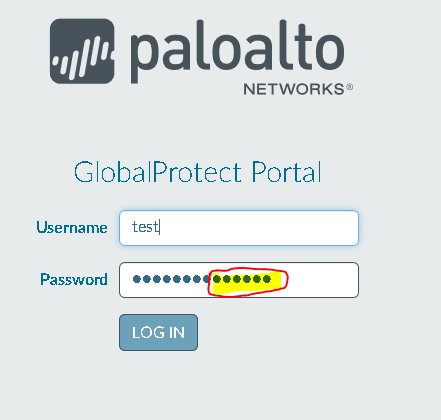
Step 10: Test the config
Commit the config, visit the Globalprotect portal externally. Type in username, and in the passwordfield, type thepassword + the google authenticator code.
So if your password is MyPassword and google authenticator code is 123 456 the password you type in would be “MyPassword123456”
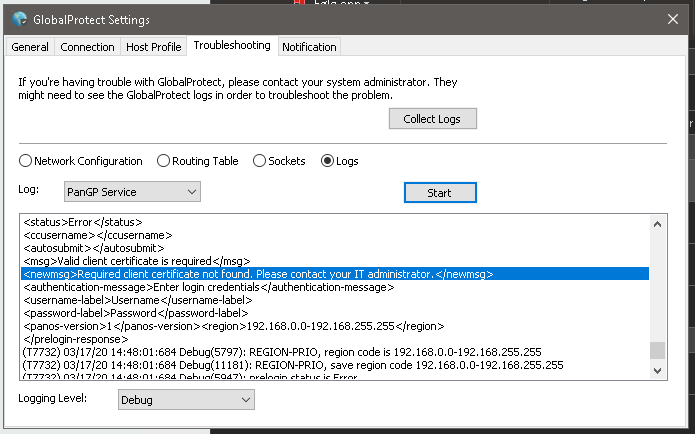
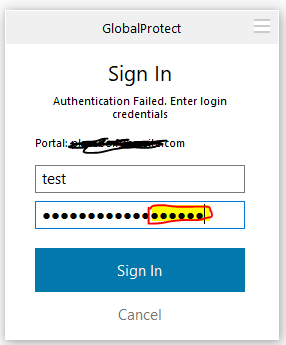
Step 12: Testing the authentication in the GlobalProtect client
Download and install the client, if you havent done it yet. Add the portal address, your username and password+googleauthenticator:
And you’re logged in
Remember to change password at next logon. I use this settings aswell:
LATER: I will do a turitorial on LDAP integration aswell later.
So I’ve been thinking of creating a post of how to block ips when they try to do something bad to your system, for example a exploit related to a wordpress plugin on your dmz-webserver. It’s quite easy and extremely effective. Just setup a profile that will automaticly block the ip when it tries to do bad things.
So first of all, create a TAG. Name it something related to blocked-ips
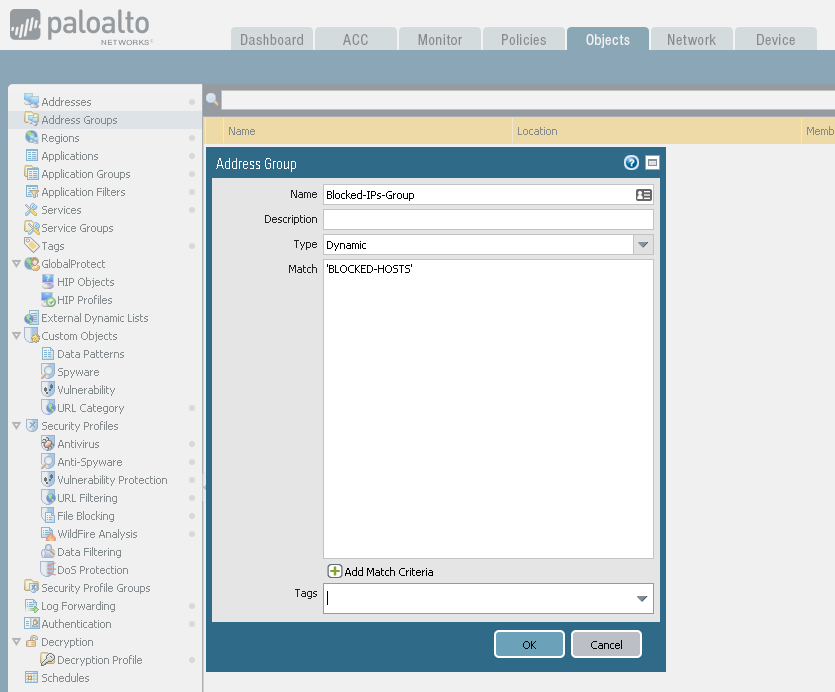
Create a Dynamic type Address Group for this TAG:
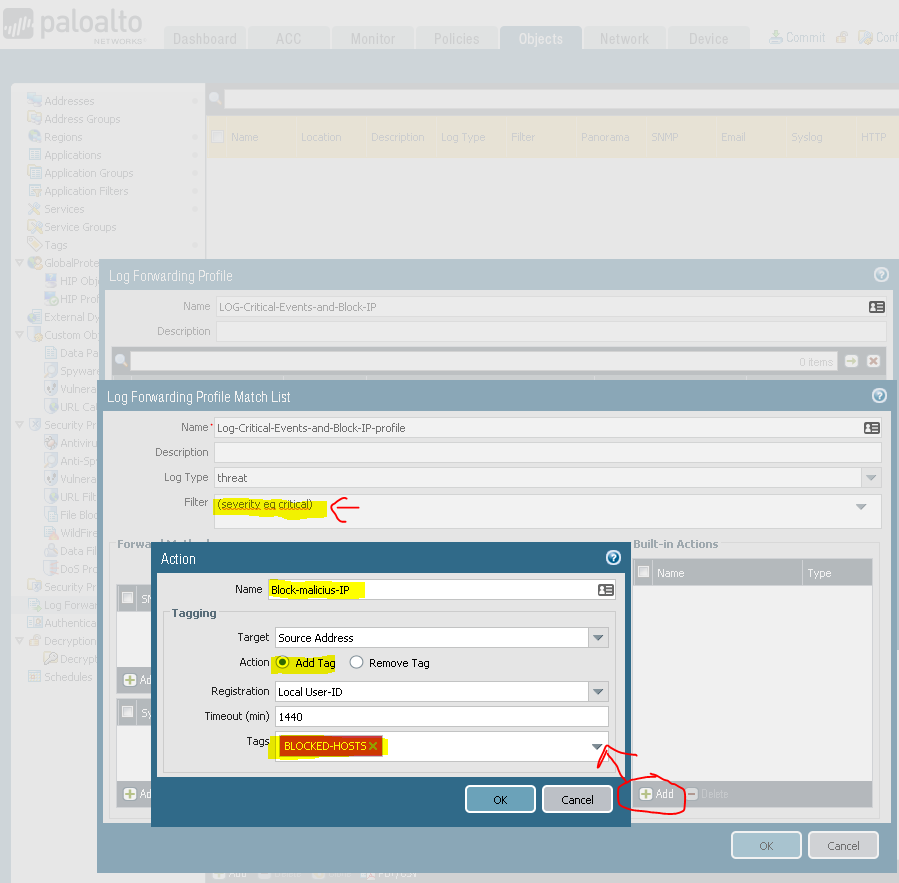
Then create a LogForwarding profile:
I chose 1440 mins timeout, so that they will be blocked for excatly 1 day.
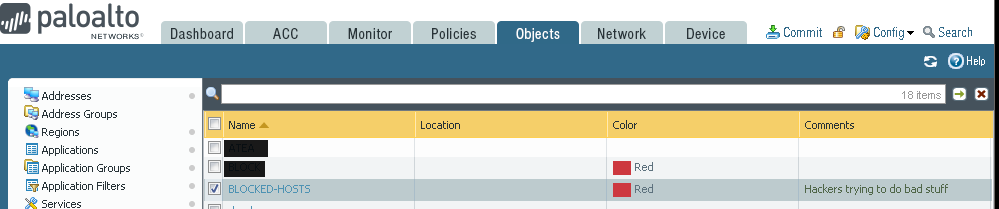
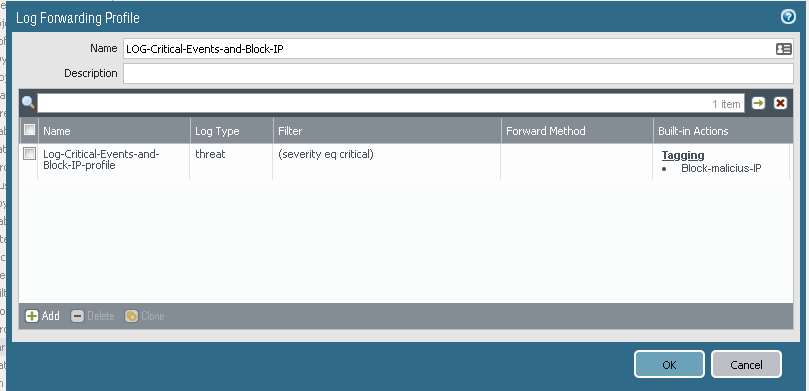
The result should be something like this:
You now have a setup that matches the severity Cirtical of the logtype Threat, that adds the sourceip of the traffic-log to the BLOCKED-HOSTS tag.
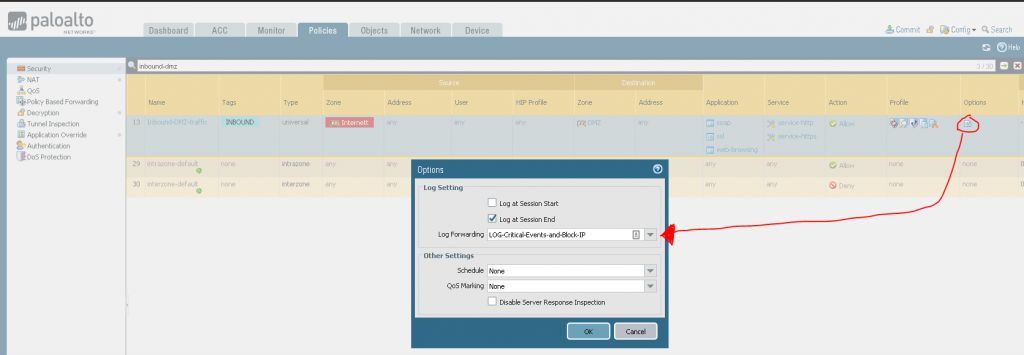
Now you can use your own incomming rule and add this log-forwarding profile to it. (BE SURE that you have a threat profile active on the rule)
To block these IP’s you need to create a Rule above the inbound rule to block these IPs:
And you are good to go. Get rid of those idiots (for a selected time atleast)
If you’re using DHCP on a PAN device, and want to get a simple way to identify users machines / phone based on device names, you can do so easylie with syslog.
This setup will convert this logline from DHCP:
DHCP lease started ip 192.168.18.140 --> mac 34:02:86:XX:XX:XX - hostname PCNO00198, interface ethernet1/2
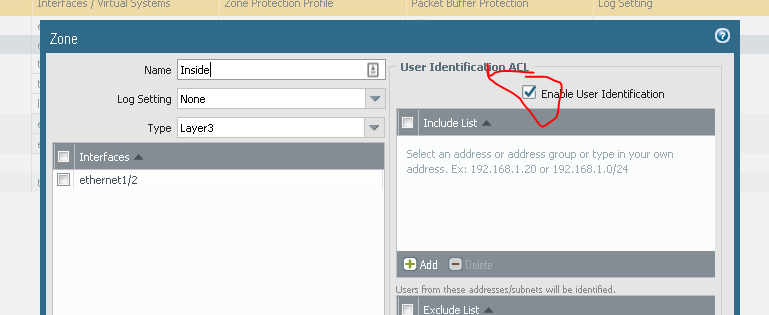
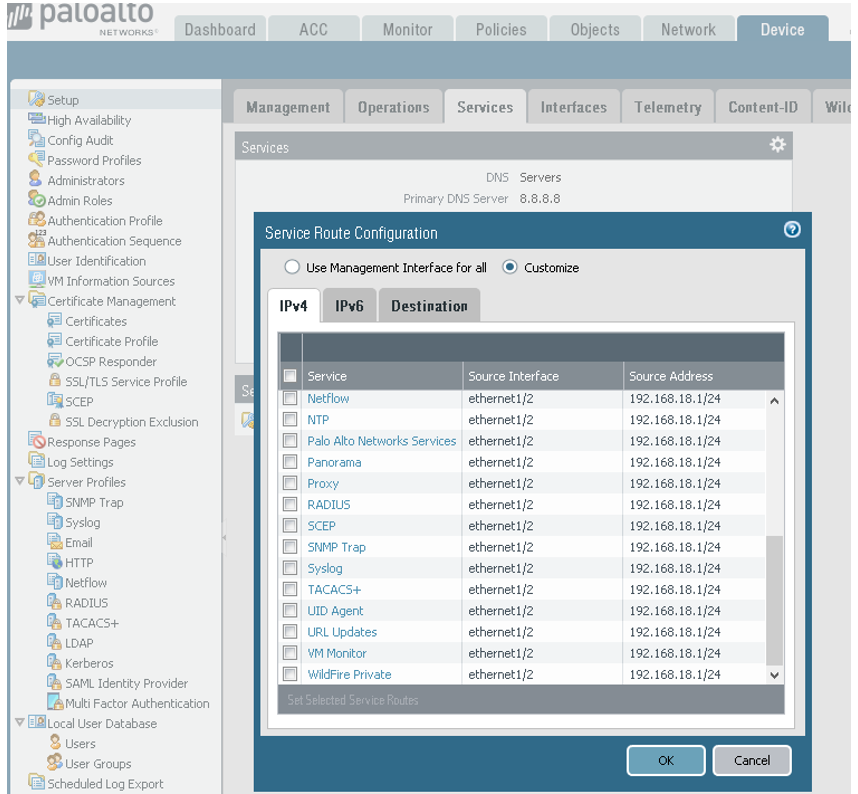
All serviceroutes setup to use Ethernet1/2, 192.168.18.1 (since I don’t use the dedicated managementport. User Identification ACL has to be enabled for the Zone you want to monitor:
Step 1:
Under Device, Server Profiles, and Syslog. Create a syslog profile that forward logs UDP port 514 to your own devices interface ip.
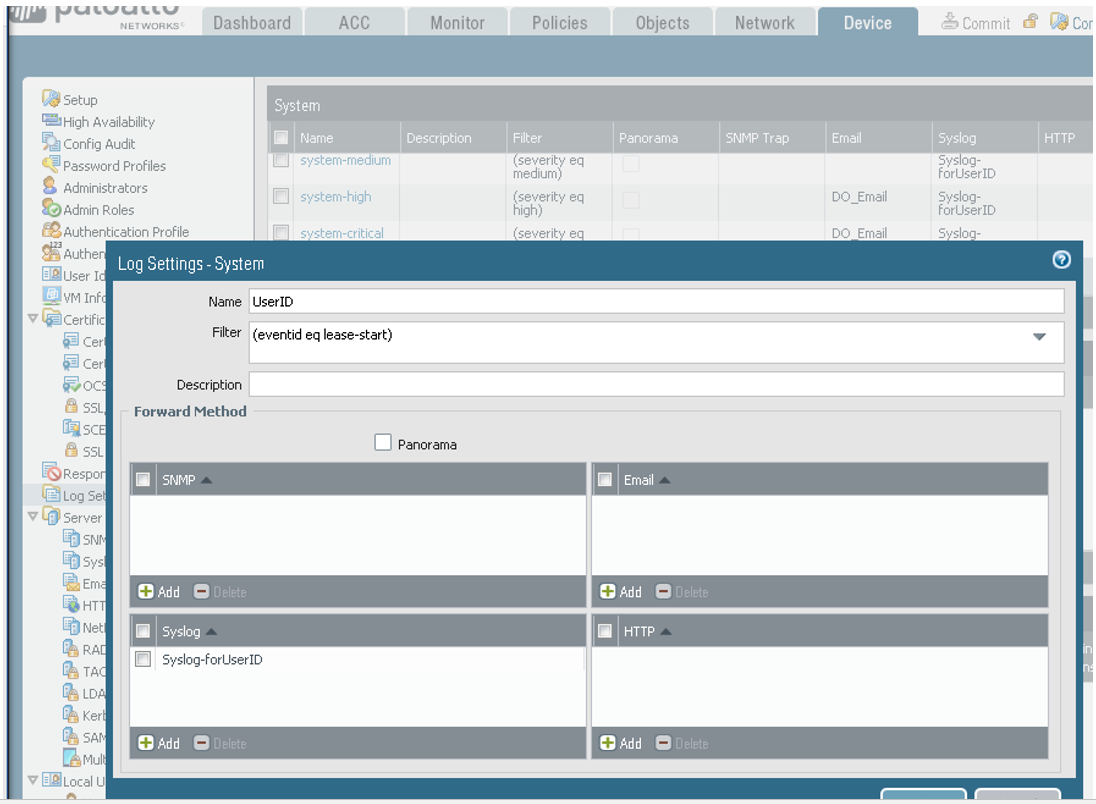
Step 2: Then, go to Logsettings And create a new Log Setting-System, add (eventid eq lease-start) in filter, and the syslogprofile you created in step 1.
Step 3:
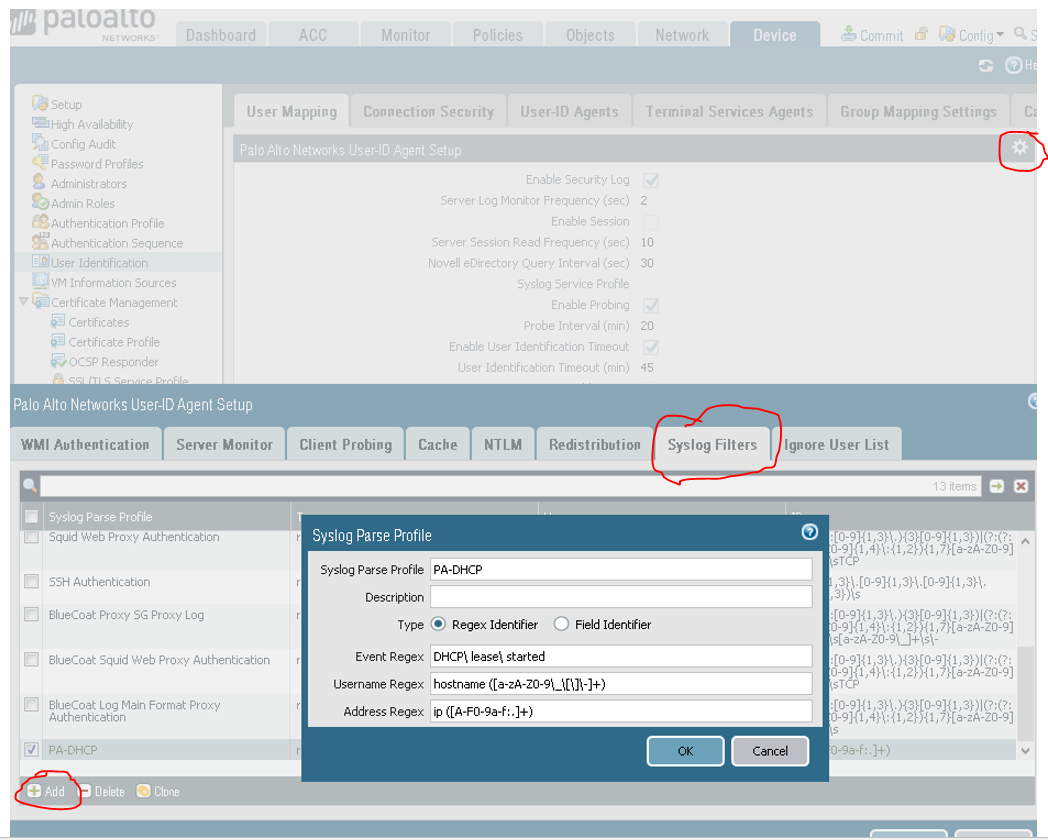
Create a syslogfilter. Go to User Identification, Usermapping, then Palo Alto Networks User-ID Agent Setup, then Syslogfilter, ADD, name it something like PA-DHCP, use Regex Identifiser,
Event Regex: DHCP\ lease\ started
Username Regex: hostname ([a-zA-Z0-9\_\[\]\-]+)
Address Regex: ip ([A-F0-9a-f:.]+)
Step 4:
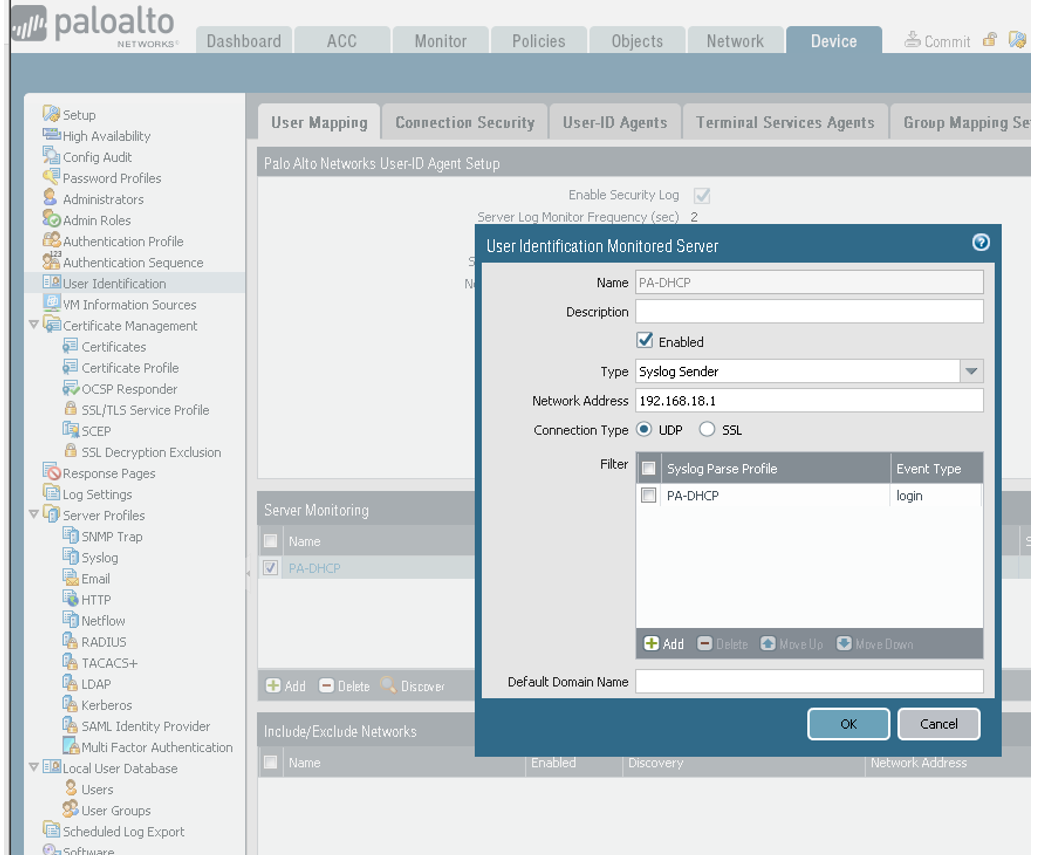
Under User Identification, and new Server Monitoring (User Identification Monitored Server), Enabled, Type Syslog Sender, and ip of sender (in my case 192.168.18.1, because of service routes), Connection Type: UDP , and the Syslog Filter you created in step 3
Step 5:
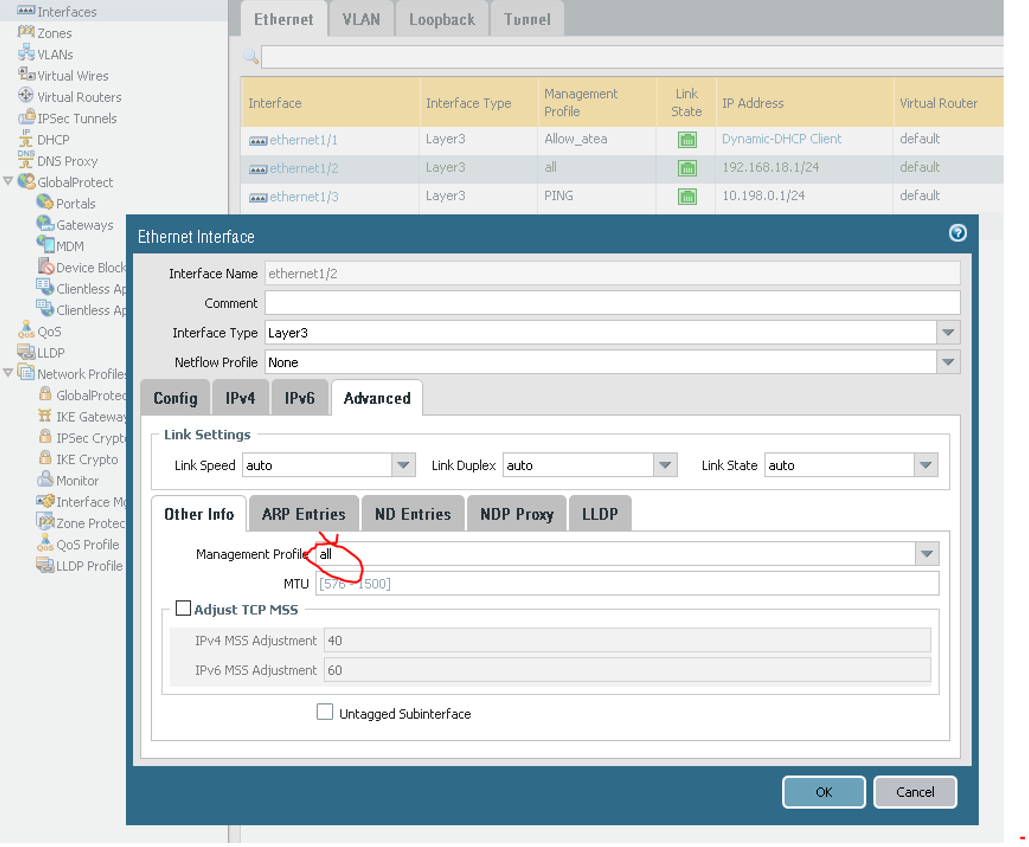
Allow the Interface to be used as User ID syslog listener-UDP. Go to Network, then Network Profiles, and Interface Mgmt. Create a interface Management profile, and allow User-ID Syslog Listener-UDP.
Attach this profile to the interface (in my case the Ethernet1/2 192.168.18.1)
And you’re good to go!
TIP: Be sure to have the right service routes configured if you’re not using management-interface.