Author: raymond

  • Lipo battery cheat sheet

    Ever since transitioning from traditional drones from DJI over to FPV and now self buildt fpv drones using LiPos Ive been a bit scared of how you are supposed to treat these batteries. Im used to the traditional percent indication of battery charging and usage. LiPos is something much more complex and requires a bit of learning to be comfortable using, charging and storing. Here`s a little cheatsheet that I use to remember all of this and different recommendations.

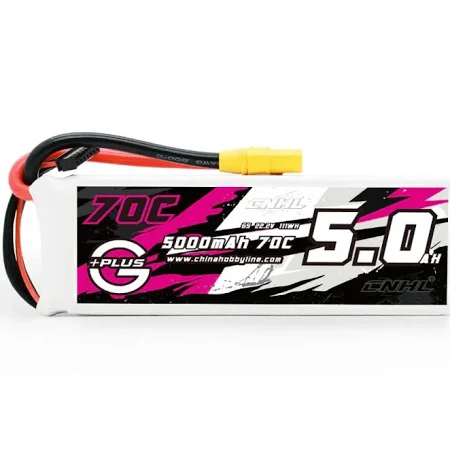
    For a 6S LiPo battery used in an FPV drone, the recommended voltage values are:

    • Max Charging Voltage (Fully Charged):
      • 4.2V per cell25.2V total (Standard LiPo)
      • 4.35V per cell26.1V total (If using HV LiPo – High Voltage LiPo)
    • Minimum Recommended Voltage for Landing:
      • 3.5V–3.6V per cell21.0V–21.6V total (Safe landing voltage)
      • 3.3V per cell19.8V total (Absolute minimum, but avoid reaching this often to prevent battery damage)
    • Storage Voltage (For Long-Term Battery Health):
      • 3.8V per cell22.8V total (Ideal storage voltage)

    1. Internal Resistance (IR)

    • What it is: Measures battery health and efficiency; lower resistance means better performance.
    • Ideal Values:
      • 1–5 mΩ per cell for a high-quality, new battery.
      • Above 10 mΩ per cell indicates aging or potential degradation.
    • Tips:
      • Higher IR leads to voltage sag and lower power output.
      • Regularly check IR using a charger or battery tester.
      • Avoid using batteries with significantly high IR, as they may overheat under load.

    2. Temperature Management

    • Ideal Operating Temperature:
      • During Use: 20°C to 45°C (68°F to 113°F)
      • During Charging: 15°C to 35°C (59°F to 95°F)
      • Avoid:
        • Over 60°C (140°F) as this can damage cells permanently.
        • Flying in cold temperatures (<10°C / 50°F) can cause voltage sag. Warm up batteries before flight in cold weather.
    • Cooling Down:
      • After flying, let the battery cool to room temperature before charging.
      • Never charge a hot battery immediately after use.

    3. Storage Recommendations

    • Voltage: 3.8V per cell (22.8V for 6S)
    • Temperature: 15°C to 25°C (59°F to 77°F)
    • Humidity: Low humidity (<50%) to prevent corrosion.
    • Storage Duration:
      • Short-term: Can store for a few days fully charged but not recommended.
      • Long-term (weeks/months): Always store at 3.8V per cell.
    • Safe Storage Practices:
      • Store in a LiPo-safe bag or fireproof container.
      • Keep away from flammable materials.
      • Periodically check voltage if stored for months.

    4. Placement and Mounting in FPV Drones

    • Secure Mounting: Use a strong Velcro strap and battery pad (like Ummagrip) to prevent shifting during flight.
    • Center of Gravity: Place the battery as close to the center as possible to maintain balance.
    • Orientation:
      • Most FPV drones mount batteries on top for better maneuverability.
      • Some long-range setups use bottom-mounted batteries for stability.
    • Protection:
      • Consider foam padding to absorb impact.
      • Avoid crushing or bending the pack.

    5. Charging Safety

    • Use a Balance Charger to ensure all cells are charged evenly.
    • Charge in a Safe Area: Avoid charging near flammable objects.
    • Never Leave Unattended while charging.
    • Use the Right Amperage:
      • 1C charging (e.g., 1300mAh battery → charge at 1.3A) is the safest.
      • 2C+ charging is possible for some high-quality LiPos, but it may reduce lifespan.

    LiPo Connectors & Chargers for FPV Drones

    Proper connectors and charging equipment are essential for safety and performance. Here’s what you need to know:


    1. Battery Connectors

    Different LiPo connectors affect power delivery, resistance, and compatibility with your FPV drone setup.

    Common Connector Types for FPV Drones:

    1. XT60 (Most Common for 4S & 6S LiPo)
      • Rated for 60A continuous, 180A peak
      • Standard on most FPV drones (5-inch & up)
      • Reliable and widely used
    2. XT90 (For High-Power Setups)
      • Rated for 90A continuous, 240A peak
      • Used for larger quads (7-inch+, X-Class, cine-lifters)
      • Includes an anti-spark version to prevent arcing when plugging in
    3. XT30 (For Small Drones & Whoops)
      • Rated for 30A continuous
      • Used on 2S–4S small drones (Toothpicks, Tiny Trainers)
    4. EC5 / AS150 / QS8 (For Heavy-Lift Drones)
      • Used in X-Class drones, large cine-lifters, & long-range quads
      • QS8 has an anti-spark feature to prevent connector damage
    5. JST / PH2.0 / BT2.0 (For Micro Drones)
      • JST (Red) → Used in some 2S drones (~5A rated)
      • PH2.0 / BT2.0 → Used in tiny whoops (BT2.0 is better for power delivery)

    Connector Tips:

    ✅ Always match connectors on your drone and battery.
    ✅ Use high-quality, gold-plated connectors for better conductivity.
    ✅ Keep connectors clean and tight to avoid voltage drops.
    ✅ If soldering connectors, use proper gauge wire (12AWG for 6S).
    ✅ Avoid adapters unless necessary (they add resistance and voltage sag).


    2. LiPo Chargers & Charging Tips

    Types of LiPo Chargers:

    1. Basic Chargers (Single Port, Plug & Play)
      • Example: iMAX B6
      • Good for beginners but slow & limited
    2. Smart Chargers (Multi-Port, Balance, Fast Charging)
      • Example: ISDT, HOTA D6 Pro, ToolkitRC M6
      • Supports multiple LiPos, balance charging, and adjustable current
    3. Parallel Chargers (Charge Multiple Batteries at Once)
      • Use a parallel charging board to charge multiple same-voltage batteries
      • Ensure all batteries are at a similar voltage before plugging in

    Recommended Charger Features:

    Balance Charging (ensures even voltage across all cells)
    Adjustable Current & Voltage (for different battery sizes)
    Storage Mode (automatically discharges to 3.8V per cell)
    High Power Output (for faster charging; 100W+ recommended)

    Charging Safety Tips:

    ⚠️ NEVER charge damaged or puffy batteries!
    ⚠️ Always charge in a LiPo-safe bag or fireproof container.
    ⚠️ Never overcharge (4.2V per cell max).
    ⚠️ Don’t leave batteries charging unattended.
    ⚠️ Use correct charge current (1C = safest, 2C max for fast charging).


    3. Parallel Charging – Fast Charging Multiple Batteries

    Parallel charging is great for FPV pilots who need to charge multiple packs quickly.

    How It Works:

    • All batteries must be same cell count (e.g., all 6S, all 4S)
    • All batteries should be at a similar voltage before plugging in
    • Use a high-quality parallel board with fuses

    Parallel Charging Formula:

    • Example: If charging four 6S 1300mAh batteries in parallel, set charger to 5.2A (1.3A × 4) for 1C charging.
    • For 2C charging, double the current (10.4A).

    Final Takeaways

    🔋 XT60 is the standard for 6S FPV drones.
    ⚡ Use a smart charger for flexibility & better safety.
    🔥 Charge in a safe place, always monitor, and store correctly.
    🚀 Parallel charging saves time but must be done carefully.

  • Adding user interactive UID webportal for paloalto firewalls

    Just adding authentication user identification functionallity on selfhosted webportal based on local active directory

    BY NO MEANS SECURE, no input is sanitized…

    ref: https://wp.12p.no/2022/05/13/alternative-to-captive-webportal/

    First thing that is needed. php-ldap. I noticed it was not supported by php7, so i change php version to 8.x.

    # a2dismod php7.x.x

    # a2enmod php8.x.x

    then

    # apt install php-ldap

    #service apache2 restart

    then created a local website in my apache folder

    index.php:

    Then create an auth file:

    The syslogip points to the syslog recieving interface of paloalto

    domain points to the domain name

    replace: ad.placebodome.local with your ADs FQDN.

    The php-ldap function then tries to bind to the domain using the userprovided username and password. If binding fails the user is not authenticated.

    If the binding is successfull a logger command is run to send a syslog message to the Paloalto firewall with username of user and the ipaddress for the requester/user.

    As the previouse example: https://wp.12p.no/2022/05/13/alternative-to-captive-webportal/ using the syslog parser:

    Voila, the user is populated in the same way as the original

  • Alternative to captive webportal Palo Alto

    The idiotic way to implement user identification when everything else fails.

    You need:

    GPO to push automaticly run powershell

    A webserver, for example Apache

    A syslog forwarder, for example rsyslog

    And setup the Paloalto firewall as a User ID agent with syslog listener.

    Plain and simple. Absolutely not secure, but until I bother with integrating user certificates as authentication for the requests this will do.

    Powershell which runs every hour or minute on the clients

    The webserver, a simple apache server hosted on an ubuntu box without any content


    Install rsyslog if not installed

    put the following in /etc/rsyslog.d/02-apache2.conf

    Validate the config:

    systemctl restart rsyslogd

    On the paloalto, enable user-id syslog on the interface and lock the permitted address to the webserver sending the syslogs

    add the uid profile to the interface:

    Add the following syslog parser:

    Setup the server monitor:

    and the syslog parser profile.

    And you’re good to go. Not secure, but it works as a simple solution

  • Hvordan 2.5 time på Herdla ser ut når det er nordlys.

    Tok en tur til Herdla og så på nordlyset med en kompis. Dette ble resultatet:

    En timelapse av bildene
  • Trip to Bølgekraftverket

    Took a sponatious trip to Bølgekraftverket located in Toft, Rong. https://www.google.com/maps/place/B%C3%B8lgekraftverket/@60.4699557,4.9247579,15z/data=!4m2!3m1!1s0x0:0x9092354b5b6cc1c0?sa=X&ved=2ahUKEwiG3YrHms_xAhXql4sKHTVsDIYQ_BIwGHoECEAQBQ

    Took a few photos. Fun to take photos again.

  • Northern Lights from Herdla

    Pictures taken 5th of january 2021

  • GlobalProtect + Client Certificate

    Setup the client certificate deployment by following this guide : https://www.virtuallyboring.com/setup-microsoft-active-directory-certificate-services-ad-cs/

    Start of by exporting the CA certificate:

    Install the certificate on you Palo Alto Firewall:

    the certificate should look something like this:

    Create a Certificate profile:


    Add this profile to your Authentication settings on the GlobalProtect gateway:

    Now you can access your globalprotect vpn with the required client certificate.

    If you get disconnected right away you can check the debug logs undre Troubleshooting, look for this message:

    indicating the client certificate is not correct or missing

  • 2. february 2020

    Went for a walk in the mountains today… took some pictures

    On top of Stoltzekleiven. Beautiful weather today. Sandvikspilen to the left
    Panorama stiched from 6 photos
    F22 1 sek

  • Setting up Palo Alto GlobalProtect VPN 2fa-authentication using Google Authenticator

    TL;DR : Enable free 2FA using an Ubuntu server, Google authenticator and FreeRadius on service supporting radius authentication.

    So, I’ve been messing around with this for a while, and I decided I’d create a post showing how to do it.

    Basicly i have a small Ubuntu Server, with Free radius, and Google authenticator module. Using the users defined on the Ubuntu server as allowed-users.

    Step1: Start installing the needed tools on the Ubuntu server running this command

    This will install the applications and tools you need. There are different ways of setting up free-radius in terms of the user running the service, but since I hate services running as root I used the freerad user account with lower privlegdes.

    Step 2: edit the /etc/freeradius/users file, and add the following:

    Step3: edit the /etc/freeradius/sites-enabled/default and remove # before PAM

    Step4: edit the file /etc/freeradius/clients.conf. Add these lines to the end. Change the ip-adress allowed andradius secret to whatever you need it to be, I recommend using a password generator…

    Then Restart the service: sudo service freeradius restart

    Step 5: Then edit the /etc/pam.d/radiusd file to define the google authenticator:

    Step 6: For each user you need to create a google authenticator token. running the command google_authenticator as each user will guide you trough the process.

    You can scan the QR-code in the google authenticator app, and ofcourse keep the backupcodes of later use (you can access these keys by viewing .google_authenticator file)

    A file named .google_authenticator will be created in each users homefolder. We need to move this file in to the freeradius folder under /etc/freeradius/*USERNAME*

    Step 6.1: Since we dont use the root user we need to allow the freerad user to access the google authenticator file for the user (the user is named TEST here):

    Step 7: Test the setup using radtest:

    Yellow is the google authenticator code

    If the test is successfull you should see this line:

    Step 8: Configure the Palo Alto firewall to use the radius server with 2FA for Global Protect VPN:

    Go to Device, then Server Profiles, and select Radius. Create new radius profile:

    To test the settings, commit and from CLI to the firewall type:

    Ofcourse you need to change the profilename and username to what it needs to be.
    At the passwordprompt type YourPassword+GoogleAuthenticatorCode
    Result should look something like this.

    For more troubleshooting if this does not work.

    tail -f /var/log/auth.log

    or

    tail -f /var/log/freeradius/freeradius.log

    Troubleshooting from cli (yes, i use Tmux.)

    Step 9: Go to authentication profile, and add a new


    Add this profile to the portal config:

    Step 10: Test the config

    Commit the config, visit the Globalprotect portal externally. Type in username, and in the passwordfield, type thepassword + the google authenticator code.

    So if your password is MyPassword and google authenticator code is 123 456 the password you type in would be “MyPassword123456”

    Step 12: Testing the authentication in the GlobalProtect client

    Download and install the client, if you havent done it yet. Add the portal address, your username and password+googleauthenticator:


    And you’re logged in

    Remember to change password at next logon. I use this settings aswell:

    LATER: I will do a turitorial on LDAP integration aswell later.

  • Blocking malicius IP’s automaticly with Palo Alto Firewalls

    So I’ve been thinking of creating a post of how to block ips when they try to do something bad to your system, for example a exploit related to a wordpress plugin on your dmz-webserver. It’s quite easy and extremely effective. Just setup a profile that will automaticly block the ip when it tries to do bad things.

    So first of all, create a TAG. Name it something related to blocked-ips

    Create a Dynamic type Address Group for this TAG:

    Then create a LogForwarding profile:

    I chose 1440 mins timeout, so that they will be blocked for excatly 1 day.

    The result should be something like this:


    You now have a setup that matches the severity Cirtical of the logtype Threat, that adds the sourceip of the traffic-log to the BLOCKED-HOSTS tag.

    Now you can use your own incomming rule and add this log-forwarding profile to it. (BE SURE that you have a threat profile active on the rule)

    To block these IP’s you need to create a Rule above the inbound rule to block these IPs:


    And you are good to go. Get rid of those idiots (for a selected time atleast)